Hi quest ,  welcome  |  sign in  |  registered now  |  need help ?
Showing posts with label Simple Tricks. Show all posts

List of Shortcut Keys for VLC Media Player

Written By Srikanth on Sunday, 17 July 2011 | 21:45

VLC media player is one of the most popular media player used all over the world, here is the list of shortcuts which one can use for VLC media player 


1. Space : Play / Pause
2. N : Next Entry in Playlist
3. P : Previous Entry in Playlist
4. S : Stop
5. Alt + Left Arrow : Backward Jump
6. Alt+ Right Arrow : Forward Jump
7. Shift + Left Arrow : Short Backward Jump
8. Shift + Right Arrow : Short Forward Jump
9. + : Play Faster
10. – : Play Slower
11. Ctrl+ Up Arrow : Volume Up
12. Ctrl+ Down Arrow : Volume Down
13. M : Mute
14. Ctrl + H : Subtitle Delay Up
15. Ctrl + J : Subtitle Delay Down
16. Ctrl + P : Select Previous DVD Title
17. Ctrl+ F : Select Next DVD title
18. Ctrl + M : Go to DVD menu
19. Ctrl+ Left Arrow : Medium Backward Jump
20. Ctrl+ Right Arrow : Medium Forward Jump
21. Alt + Ctrl + Left Arrow : Long Backward Jump
22. Alt + Ctrl + Right Arrow : Long Forward Jump
23. Ctrl+ O : Open Directory

21:45 | 0 comments

Tips How To Increase Your Alexa Rank

Written By Srikanth on Saturday, 16 July 2011 | 03:42

1.) Install the Alexa toolbar and make your website the homepage. 

2.) Write a post about Alexa.   
{As most webmasters like to transfer there traffic to there related posts.}


3.) Write some post on top Alexa site.  
{Can find Top Site Here As it help to get traffic who already installed Alexa toolbar}


4.) Tell your friends to write review about site. 
{As it also related to increase Alexa Rank. Write Review}
5.) Put an Alexa Rank Widget on your site(blog). 
{As when your page load Alexa Rank Widget also load as it tell Alexa that your page is in progress without the toolbar need}


6.) Tell your friend to install Alexa Toolbar And make your site as Homepage.


7.) Last but not least Join stumbleupon {As it always bring unique traffic to your site whose already installed Alexa Toolbar.}
03:42 | 0 comments

Best Temporary Email Address Service

Have you ever downloaded a software, where you have to register with your email to receive the activation-code or the simple download-link?
Have you ever registered to a forum with your real email, just to post one question or comment?

And in every case, you give your real email address and get tons of "Spam Mails" and "Special Promotions" junk-mails.
Using a disposable email address, you can create a temporary email address of yours which stays alive only for a short period of time and automatically disposed off after the given time period.
By using these Temporary e-mails services, you not only save the time , but also save your email account from unwanted spam.
There are dozens of Temporary/Disposable email services, but
10minutemail.com is the one I like the most (or can be say 1 of the best). May be because it is the fastest to do all the task and with in just one page.
10minutemail.com, As the name of sites shows, it creates a disposable email ID for a time span of 10 mins! Which is more then enough to register to the sites and receive email(s) having activation links.


Unlike other services of this type, there is only one-page interface of the whole website.

10minutemail automatically creates a new temporary email as soon as you enter on its home page.


HOW IT WORKS?

1. Open
10minutemail.com
2. Just click and copy the already created temporary address, Don’t close the window.
3. Go to the site, where you want to register using this 10minute email address.
4. Come back to the 10minutemail page, from where you copied the temp. email address.
5. You’ll see new email(s) arriving on the same page under "Messages" table.
6. Just Click the email(s) you want to open.
7. Keep your eye on continuously updating remaining time, displayed on the page.

If you want to register on some other sites, using same temp.email address, new emails will be displayed on this same page. And the best part is that you dont even have to REFRESH the page in order to see new incoming emails.

Page automatically refreshes as soon as new mail arrives.

This is the reason I like to use this service , the one-page interface I was taking about, Less clicks and no extra page loads!!


After 10 minutes, account is automatically destroyed. You are now also allowed to create your new temporary 10 minute email address.
03:16 | 0 comments

Some Tools Useful For Blogging

Written By Srikanth on Saturday, 9 July 2011 | 01:55

Hai friends I Am Providing You Some Website Which are Helpful to Maintain Your Blog...

Make Blog Ribbons
 
Blog Templates

Blog Stats(Track Your Visitors)
 
Blog Ranking
 
Online Storage
 
How many Are Online
 
Chatting Box

Direct Mobile Alerts
 
Email Subscriptions
 
Check Your Blog Look in Different Browsers
 
Create a Free Contact Me Form

 Download Your Page As PDF
 
Related Posts With Thumbnails

 Blogger Widgets


01:55 | 0 comments

How To Create The Multiple Labels In Blogger Home Page

Written By Srikanth on Wednesday, 6 July 2011 | 01:05


Do You Wnna Keep the Multiple Labels Like This???


Just Follow The Steps::
Goto Blogger Dashboard--Design-- Click On Ad A Gadget

 In That Select Labels Gadget

Select Selected Labels and Click On Edit

  and Select The Selected Labels To Display On Group

Click On Done... :)

Thats it.. Like this We Can Add Different Different Labels For Different Categories
01:05 | 0 comments
Some Tricks In Windows xp

Written By Srikanth on Thursday, 30 June 2011 | 04:57

Click here To See All The 3 Tricks


Change The Windows Sounds

Hai Friends Today i am going to Explain a small Trick Which Brings a Musical Change To your System
I Think Many Of the people knows this... :)
Its Nothing But Change the System sounds like
While Starting Windows, While making Shut Down, While Emptying Recycle Bin,
While coming Error message And Many More Situations like This :)
Those Who dont know to change the sounds in your PC See This
And Those Who already Know this Trick can Skip From This Post
Go To Control Panel -- Click On "Sound, Speech and Audio devices"(in Category View)--Click On "Change Sound Scheme"
Select Any item you want to change from Programme Events And Click On Browse
Default Windows Sounds will be displays... select any sound you like (Or)
If you have any sounds with you? just convert them into wav format and upload :)


Screen Shot Of Selected Window

We All Know that If You Want to take A Screen Shot Of Your Desktop Just Click Print Screen Button on your keyboard and Open paint and Press Cntrl+v or paste There
But If You want Screen Shot of a Particular Window what will you do???
Dont waisttime by cropping or doing any other editing work to extract the required window
there is a small trick here nothing but pres "Alt+print screen" to take the screen shot of only selected window
Its Cool trick to Take Windows Screen Shots :)

Remove The Side Bar in Windows

In Every Computer By default Windows operating  System Divide the 80% of Space to view files and Folders and Remaining 20% Will Displays System Tasks, Other Places and Something Details
Those Who dont want to see the Complete Window With Folders Can Remove it by...
Tools--Folder.Options--Use Windows Classic Folders
And Click Apply.. Thats it :)
04:57 | 0 comments

Make Your Mobile Number As Not Reachable!

Written By Srikanth on Friday, 24 June 2011 | 09:19

Make Your Mobile Number As Not Reachable!
*** No need remove sim or battery***
Make Your Mobile Number As Not Reachable!We sometimes don't
want to receive calls at a particular time. But the caller understands that we are not receiveing call.
So make your phone as unreachable and the caller will
thought that its a network
problem. No need of removing sim card!
Lets start the game!
 Click Here To See How To Do
Make Your Mobile Number As Not Reachable!We sometimes don't want to receive calls at a particular time.
But the caller understands that we are not receiveing call.
So make your phone as unreachable and the caller willthought that its a network problem.
No need of removing sim card!Lets start the game!
Go to Menu; Settings; Phone;Operator selection; Manual!
Now your phone will search for available operators.
Select any other network except your own network
(i.e. If you are using Airtel, select vodafone in).
You'll get an error message No network access!
Now look at the signal bar. It is empty!
But dont press back. If you press back, the phone will capture signal again.
If any caller call you then, he will hear that your phone is out of network range!
This trick works on almost every phone
09:19 | 0 comments

How To Stop Spamming In Cbox

Written By Srikanth on Tuesday, 21 June 2011 | 09:55

First decide whether the messages appear to be automated, or coming from a single user. 
 To prevent automated spam (spam bots), enable "Require CAPTCHA" in Settings.
 Options--Posting options--Tick On
After Selecting that The System asks the Word Verification When the User Buzz in The Chat Box For the First Time...
For spam from an individual user, try banning the user. 
 At your Messages page, select the unwanted messages and click "Ban". 
 Some users have dynamic IP addresses, which means that bans are less effective against them. 
 You can strengthen bans by selecting them in your Blocked users list and clicking "Strengthen". 

09:55 | 0 comments

How To Integrate/Combine To Gmail Accounts in One Mail Box

Written By Srikanth on Saturday, 18 June 2011 | 23:38

As the title suggest, this is possible with Gmail. And not only that. You will also have the ability to send and receive emails without having to shift from different accounts by logging in and out. This is another way of dealing multiple Gmail accounts without having to use several internet browsers.


How to do that in Gmail?


Adding the email to the main account

1. Log in to the account where you wanted to integrate all your other accounts.

2. On the upper right, click on "Settings".

3. Settings Tabs will appear. Select "Accounts and Imports".


4. Click on the "Add POP3 email account" button.

5. A new window will pop. Enter the email address and then click Next.

6. For username, enter the same email address. Enter the password. Select "pop.gmail.com" and port 995 for POP Server. Do not tick the "Leave a copy of retrieved messages". Tick "Always use a secure connection". Tick "Archive incoming message. Ticket "Label incoming message". On the pull-down menu select "New Label". Enter the Label name and click OK. All incoming messages from this email will automatically go straight to that folder or label.


7. Click "Add Account".

8. You will be prompted to have the ability to "send email as" as an option. Click on "Next Step".

9. Enter the email account name.

10. You will then be asked to send a verification code to that email. Click on the "Send Verification" button.

11. Close the window.

12. Check the email you just added and confirm the link to verify the account.

Setting up the remote email

1. After verifying the email account, go to Settings and then select "Forwarding and POP/IMAP"

2. Disable Forwarding.

3. Under POP Download options, Enable POP for mail that arrives from now on. When messages are accessed with POP, select "delete Gmail's copy"
.
4. Click on the "Save Changes" button.


Repeat the procedure for the other Gmail accounts you wanted to add.
23:38 | 0 comments

Send Unlimited Free SMS To India Without Advertisements

Written By Srikanth on Wednesday, 15 June 2011 | 00:22

Hai guys I am presenting A New Way To Send You SMS without any Adertisements
It Works On the Principle of Way2Sms, There are many websites which provides Free SMS service to Indian mobile numbers . All these service have some restrictions and your messages will be with advertisements until unless you pay a small amount to them. 
One Of the Software developer Jubin Mitra has made one application which provides a nice Java interface in shape of a tool by which you can send unlimited free sms to India in Seconds that to without ads and visiting some websites. Actually Jubin Free SMS tool uses Way2sms services to send the SMS.  This tool provides an interface which allows you to send SMS without going to their website. Just start this application and start sending SMS.

 Click Below To Read Complete details and Download
Here are some unique features of Jubin Free SMS tool
  • Send Unlimited Free SMS to India
  • Send Group SMS with a single click
  • Send message without any character limit
  • Message receiver will get sms from your mobile number
  • Phone book options to save your frequent contacts
  • In built connection error detector in tool
  • Very easy to use
How to send Free SMS with Jubin SMS Tool???
First of All Download this Java Application Here
(Software Download)

It Requires JRE (JAVA Runtime environment) Also, 
If You Dont Have Java In Your System Please Download this File Also 
(Java Download)

Once downloaded, run this application and login with you way2sms login and start sending SMS. 

If you don't have way2sms then follow these STEPS

STEP 1:: Get your login from Way2sms.com

STEP 2:: Login with your Way2sms user name and password

STEP 3:: Enter the number and type your message... and then click on send....


Screen Shot

00:22 | 0 comments
How To Format A Computer (Using Windows XP)

Written By Srikanth on Tuesday, 31 May 2011 | 02:53

Some Of Us Dont know how to format our system.. 
for that they are waisting much muney to hardware engineers..
Here Swaroop The King Bringing you the Simple Steps to format your Computer..

To Format Your Computer first You Need a Bootable Disc (Windows xp Service Pack CD)
If You Had It then Click Below to Know The Process (Or) Click Here To Download


 Process

1.First of all insert the windows xp bootable disc into the drive and restart the computer 


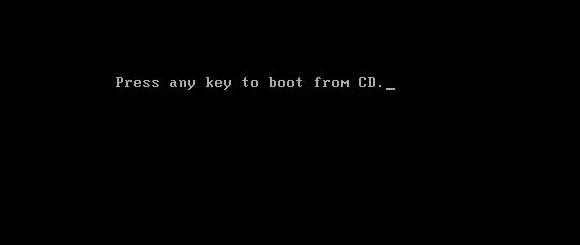
2.The the screen displays "Press any key from boot CD" Press ENTER
    (If windows starts automatically without displaying such a message then follow the Step-A)


3.System will load some files please wait untill it completes it takes some time


4.After that "Windows XP Professional setup " will appear Press ENTER

5.After that "Windows XP Licencing aggrement " will appear Press F8


6.Again "Windows XP Professional setup " will appear Press ESC

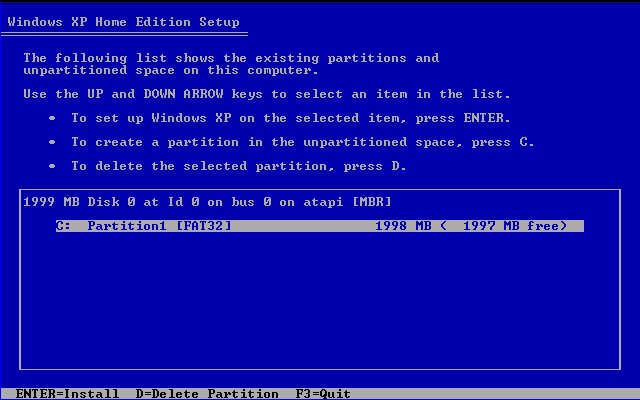
7.Now the system shows an other screen containing your Hard disc partition drives, if you need to format only C-Drive the select C-Drive using arrow keys in keyboard and Press ENTER
   (Or if you wanted to format total system follow Step-B)  
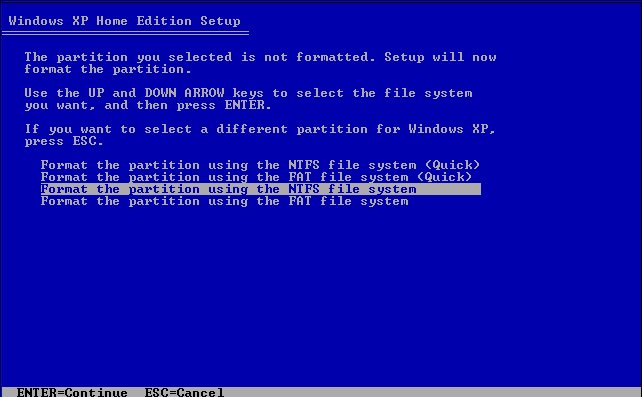
8.In the next screen Select "Format the partition using NTFS file system "  Press ENTER
9.Now the setup will  Formats your C-Drive and next it will copies files, it takes much time, be patient


10.Now the system starts rebooting wait for 15 seconds or Press ENTER to reboot immediately


11.System gets restarted And again asks "Press any key from boot cd" But please dont press any key


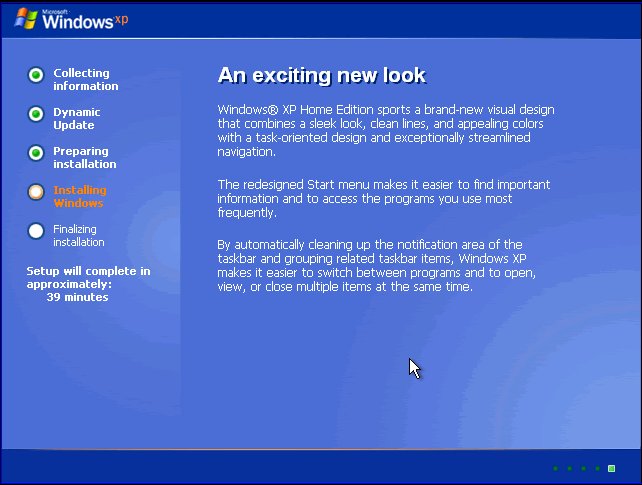
12.Windows starts installing, it takes approximately 39Minutes to install but dont go away from system there is some manual work while installing


13.Exactly after 6 Minutes system displays an message box click on Next using Mouse


14.In the next screen "Personalize your software" will displays enter your Name and organization


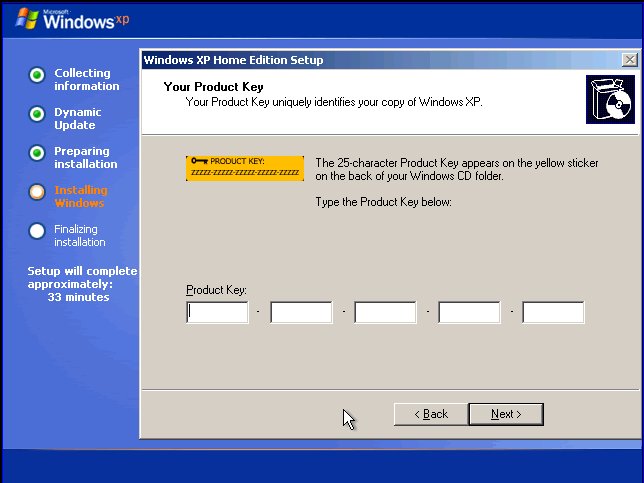
15.Enter The Windows XP key in the next screen and Press ENTER 
(If You Dont Have key Use DV8B3-D3WRR-3XH42-TKTX6-8QBDG, For Windows XP Service Pack 2)

16.In the next screen it asks for computer name enter the name and there is also another field asking adminstrator password, leave it empty and Press ENTER


17.In the next screen  set the Date and Time zone (+5:30) and click Next


18.Setup still requires 29minutes of time to complete and after that it gets restarts  And again asks "Press any key from boot cd" But please dont press any key

19.In the Next Screen "Display Setting Box" Will Appear Click OK And "Monitor Setting Box" Also Appear Again Click OK, Then The Window Gets Started

20.Click on NEXT it And Next Select Help Protect My PC And Then Click Next And then Enter Your  User Name (Different From Computer Name) Click Next And Then Click Finish :)
This Is The Way To Format Your System Easily :)
Exceptional Cases

STEP-A::Again Restart Your Computer And While restarting 
 

Continuously press DELETE button in the keyboard

* "Advanced BIOS Features" Will Displayed
* Click On First Boot Device And Press Enter
*Select CD-ROM By Using Up_Down Arrows in Keyboard and Press

Enter
*Press F 10
*Press Y And Then Press ENTER
Then the System Again restarts And Now it Will Ask "Press any key

from boot cd" Then Continue From Step 3


STEP-B::If You Wanted To Format Your System Completely Follow These Steps


*Select The C-Drive And Then Press D And then Press ENTER And

Then  Press L
*In The Same Way Delete All  Drives D,E,F... By Clicking L and D

Keys
*Your Hard Disk Will be In A Single unpartitioned Space Form Now

Our work is to create Drives with Suitable Memmory For Each Drive
*For Example If You Have 160GB Hard Disc And You Want 4 Drives

Give 40 GB For Each Drive(Partition need not be same for all drives

we can give (40+40+40+40) Or (30+40+40+50) Or (30+30+40+40+20)

Etc....
*To Make Partition First Click On The Unpartitioned Space and Press

C And Press ENTER And Give The Appropriate Memory Space Such

That C-Drive Created
*Agian Click IOn The Unparyioned Space And Create D-Drive.. In

The Same Way Create All Other Drives By Clicking  C
*After Partition Select C Drive and Press Enter.. Thats it The Windows

Setup Will Be Installed :) 

Please Comment Your Valuable Opinions
02:53 | 0 comments
Welcome Guys

Categories

Blog Archives